Learn how the AR Controller demo scene works
AR Controller beta release 0.7.0 (2022-06-25)
Table of contents
Instructions for using AR Controller in the Unity Editor
For more detailed information about the AR Controller showcase scene, see here.
-
Open the showcase scene (/Packages/AR Controller Beta SDK/Demo/AR Controller Showcase/AR ControllerShowcase.unity)
-
Press Play to run the scene (the Play button should remain depressed and glow blue)
-
Move your mouse over the Game view to begin interacting with the scene using the AR Controller Emulator - use left-click (and hold) to interact using AR Controller; use right-click and drag (with W, A, S, D keys) to move the camera around
-
Open the AR Controller dropdown menu by clicking the hamburger icon in the top-right corner of the Game view - this is where you can connect to AR Controller on Mac and mobile devices only - if connecting on Windows, see the pairing instructions here.
-
If using Unity on Mac, wait for your AR Controller device name to appear on the list in the Game view. Ensure Bluetooth is enabled on your computer and that your AR Controller device is charged. This may take a short while the first time you run the scene
-
In the Game view, connect to your AR Controller device by clicking its corresponding “Connect” button - the button will update to say it is “Connecting…” - wait briefly while the connection is established
-
Calibrate your AR Controller with the Unity Editor:
Calibrate in Game view:
- Swipe through the AR Controller dropdown menu to the AR Controller device details tab (look for a picture of an AR Controller at the top)
- Make sure you are wearing AR Controller in the correct grip (configured by your app on the device details screen; default is Point grip)
- Point in an arbitrary direction (e.g. towards your screen) to use as ‘forwards’ whilst testing your app
- Click the Calibrate AR Controller button
Calibrate using the Unity menu:
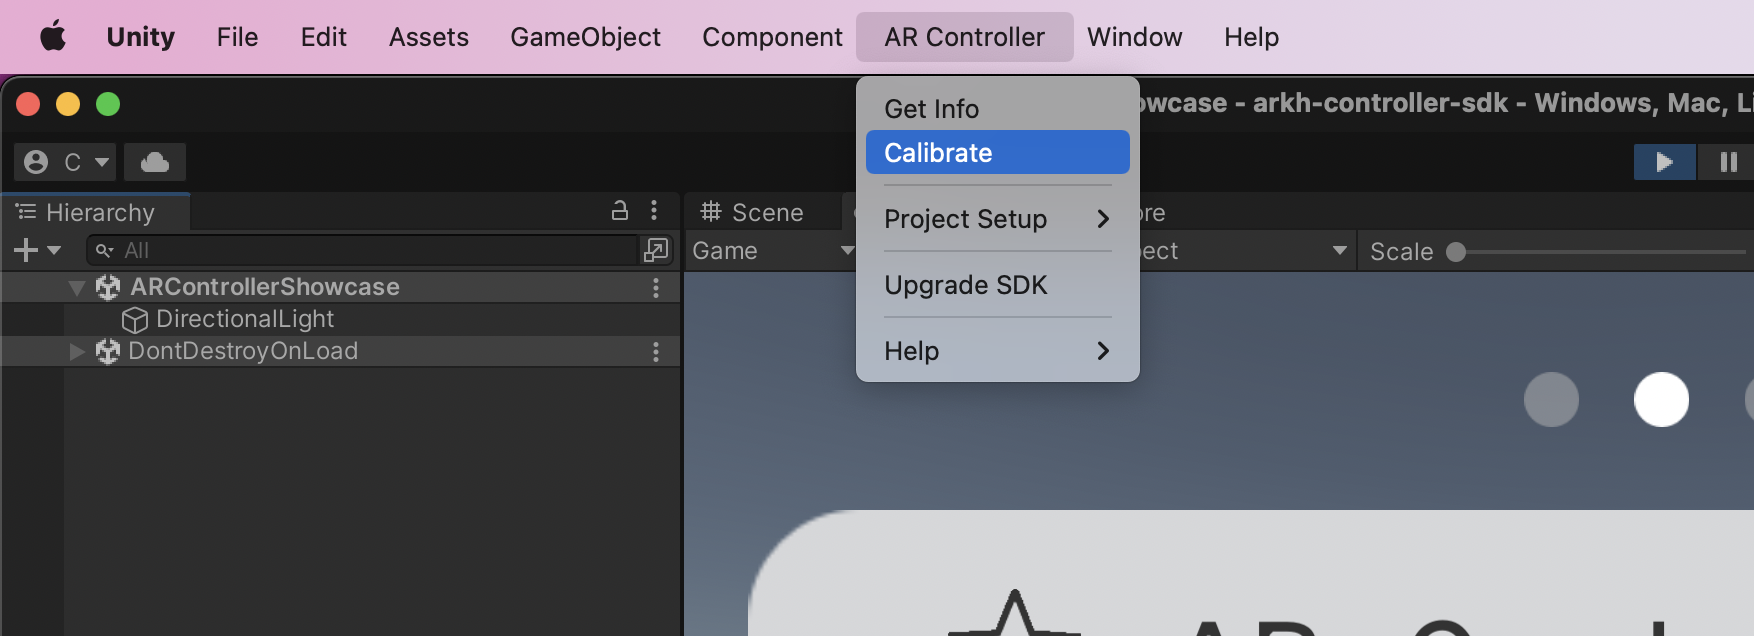
- Make sure you are wearing AR Controller in the correct grip (configured by your app; default is Point grip)
- Point in an arbitrary direction (e.g. towards your screen) to use as ‘forwards’ whilst testing your app
- In the Unity Editor menu bar press AR Controller -> Calibrate
-
You should now be able to see the laser pointer protruding from the ARController object, which should be tracking your real-world AR Controller position and orientation relative to the ARCamera object
-
By pointing at the cube in the game world, and touching and holding the touchpad on the bottom of your AR Controller, you should be able to manipulate the cube in 3D space. Whilst holding in Point grip, twist your wrist left and right to move the cube along the axis of the pointer
-
When finished, click the Play button again to stop the scene (the Play button should return to its unpressed state)