Set up your AR Controller project
AR Controller beta release 0.7.0 (2022-06-25)
Table of contents
Instructions for first use of the AR Controller SDK
Create your project
- Open Unity Hub
- Ensure you have Unity version 2021.3 installed; in Unity Hub, go to Installs and either find the required version, or click Add to install it. Alternatively, you can download different versions of Unity here. Please note:
- Other Unity versions may work but are not yet tested
- Alpha and Beta versions are not recommended
- Older versions are unlikely to support the required AR Unity packages
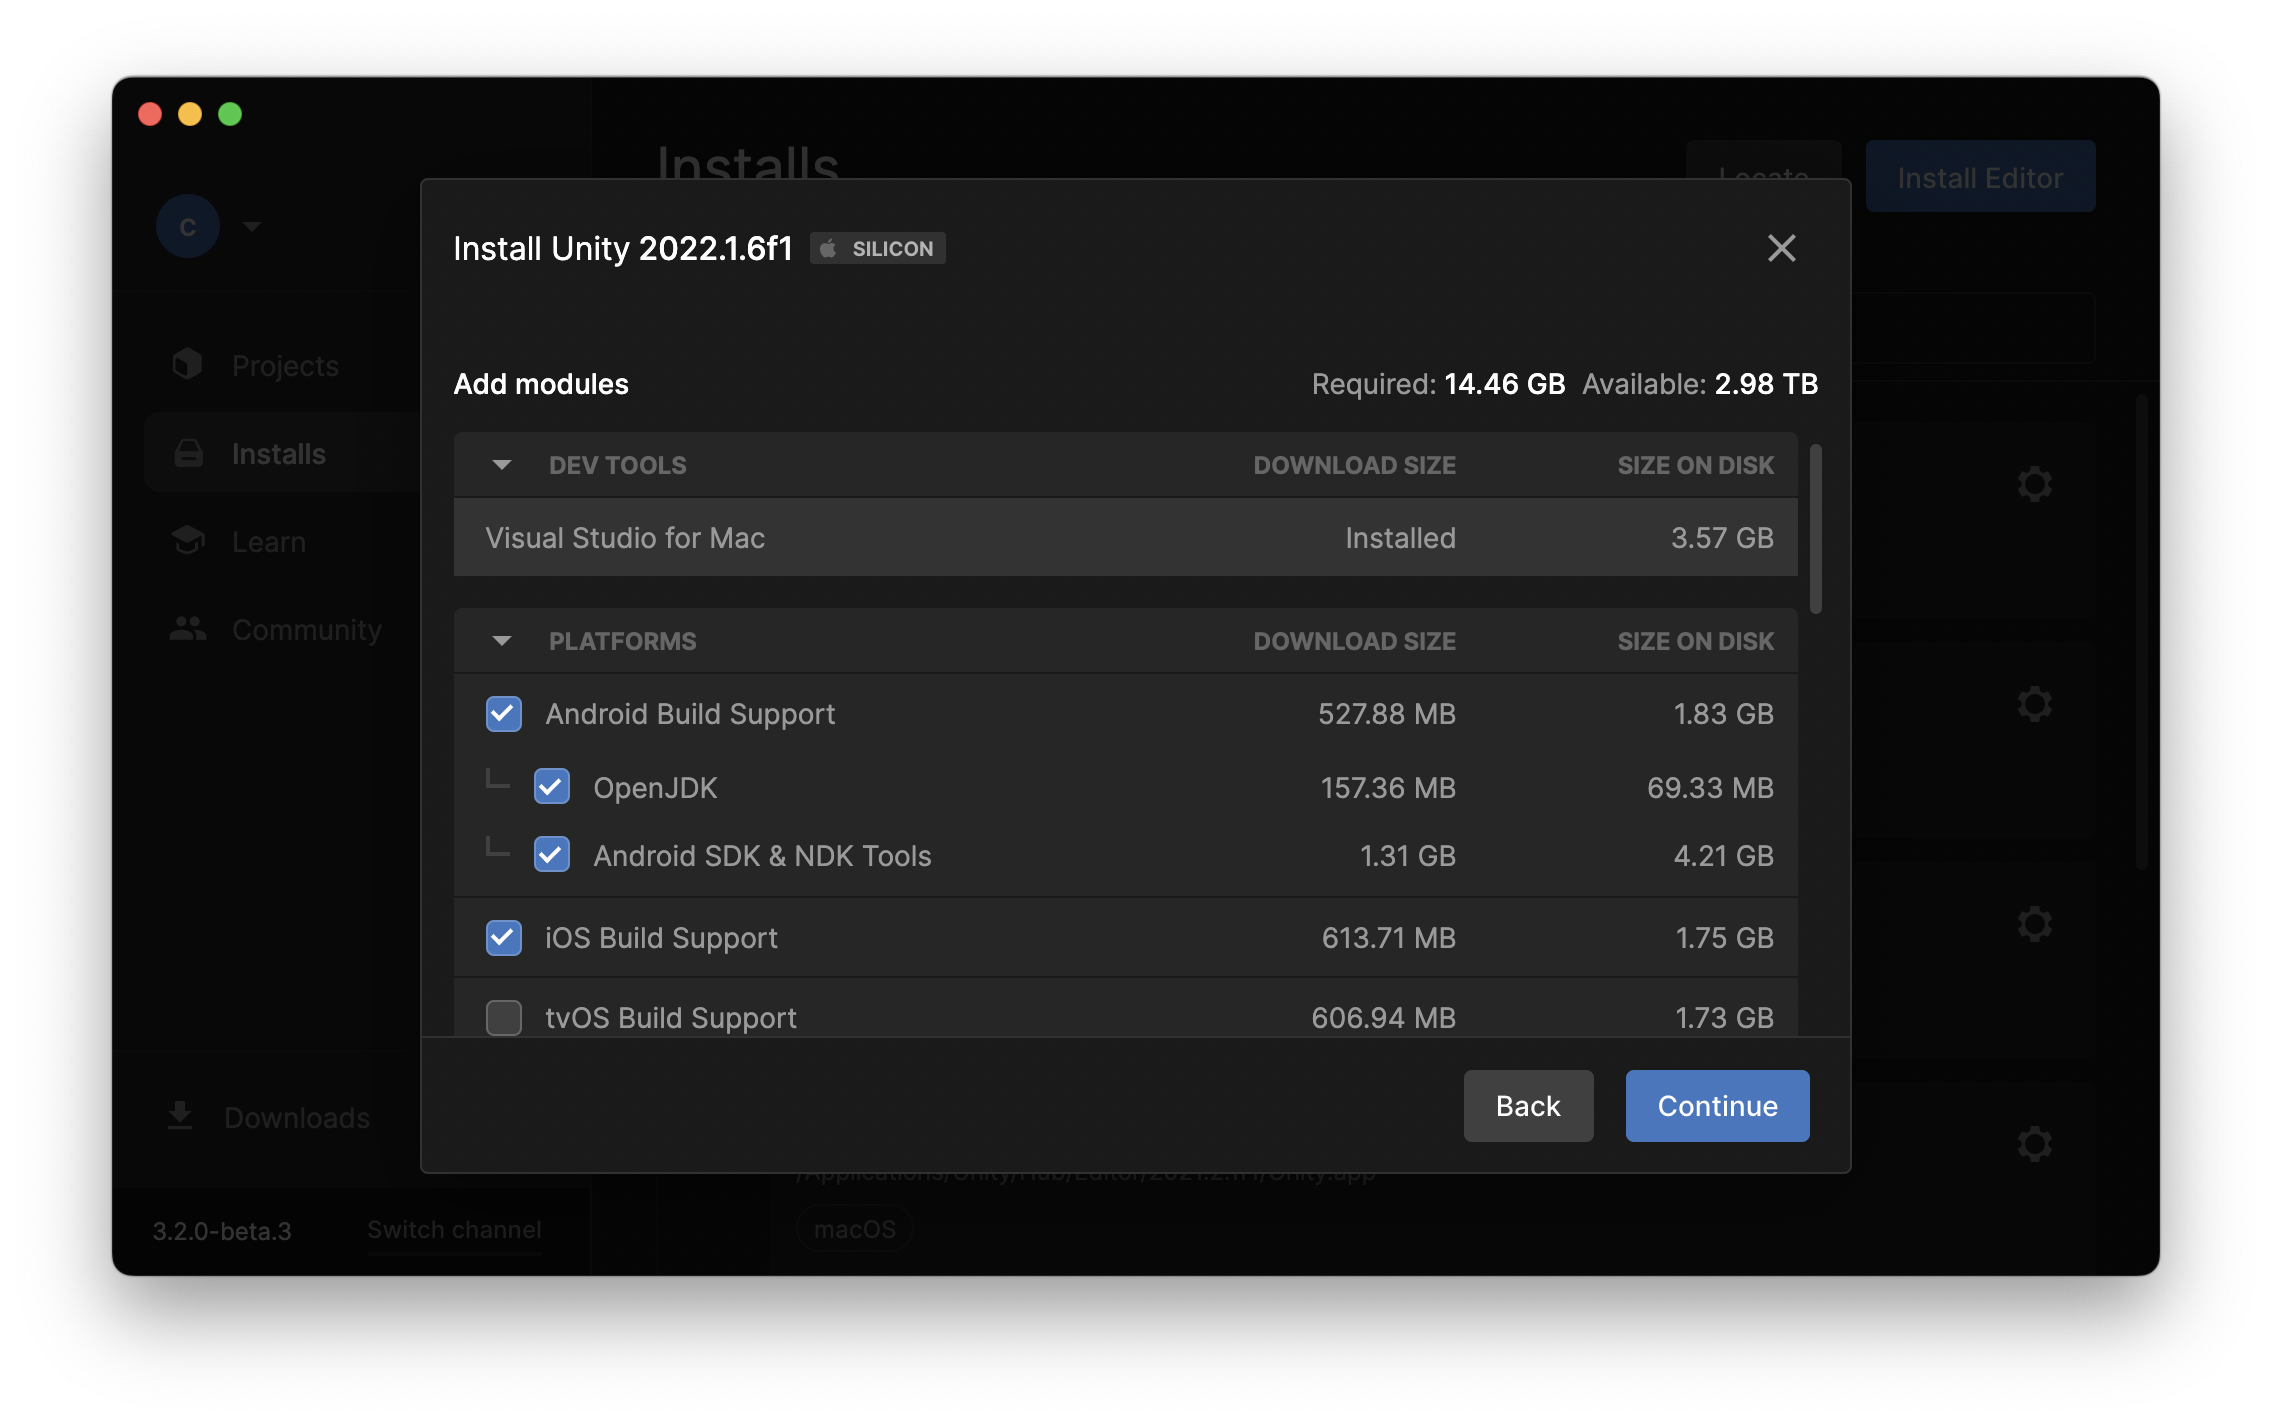
- Ensure the chosen Unity version has iOS Build Support or Android Build Support (including Android SDK & NDK Tools and OpenJDK) installed, as relevant. Note that you must have one of these options installed.
- If not installed, the additional options menu (Gear icon next to the chosen Unity version on the Installs tab) should allow you to install it via the Add Modules option
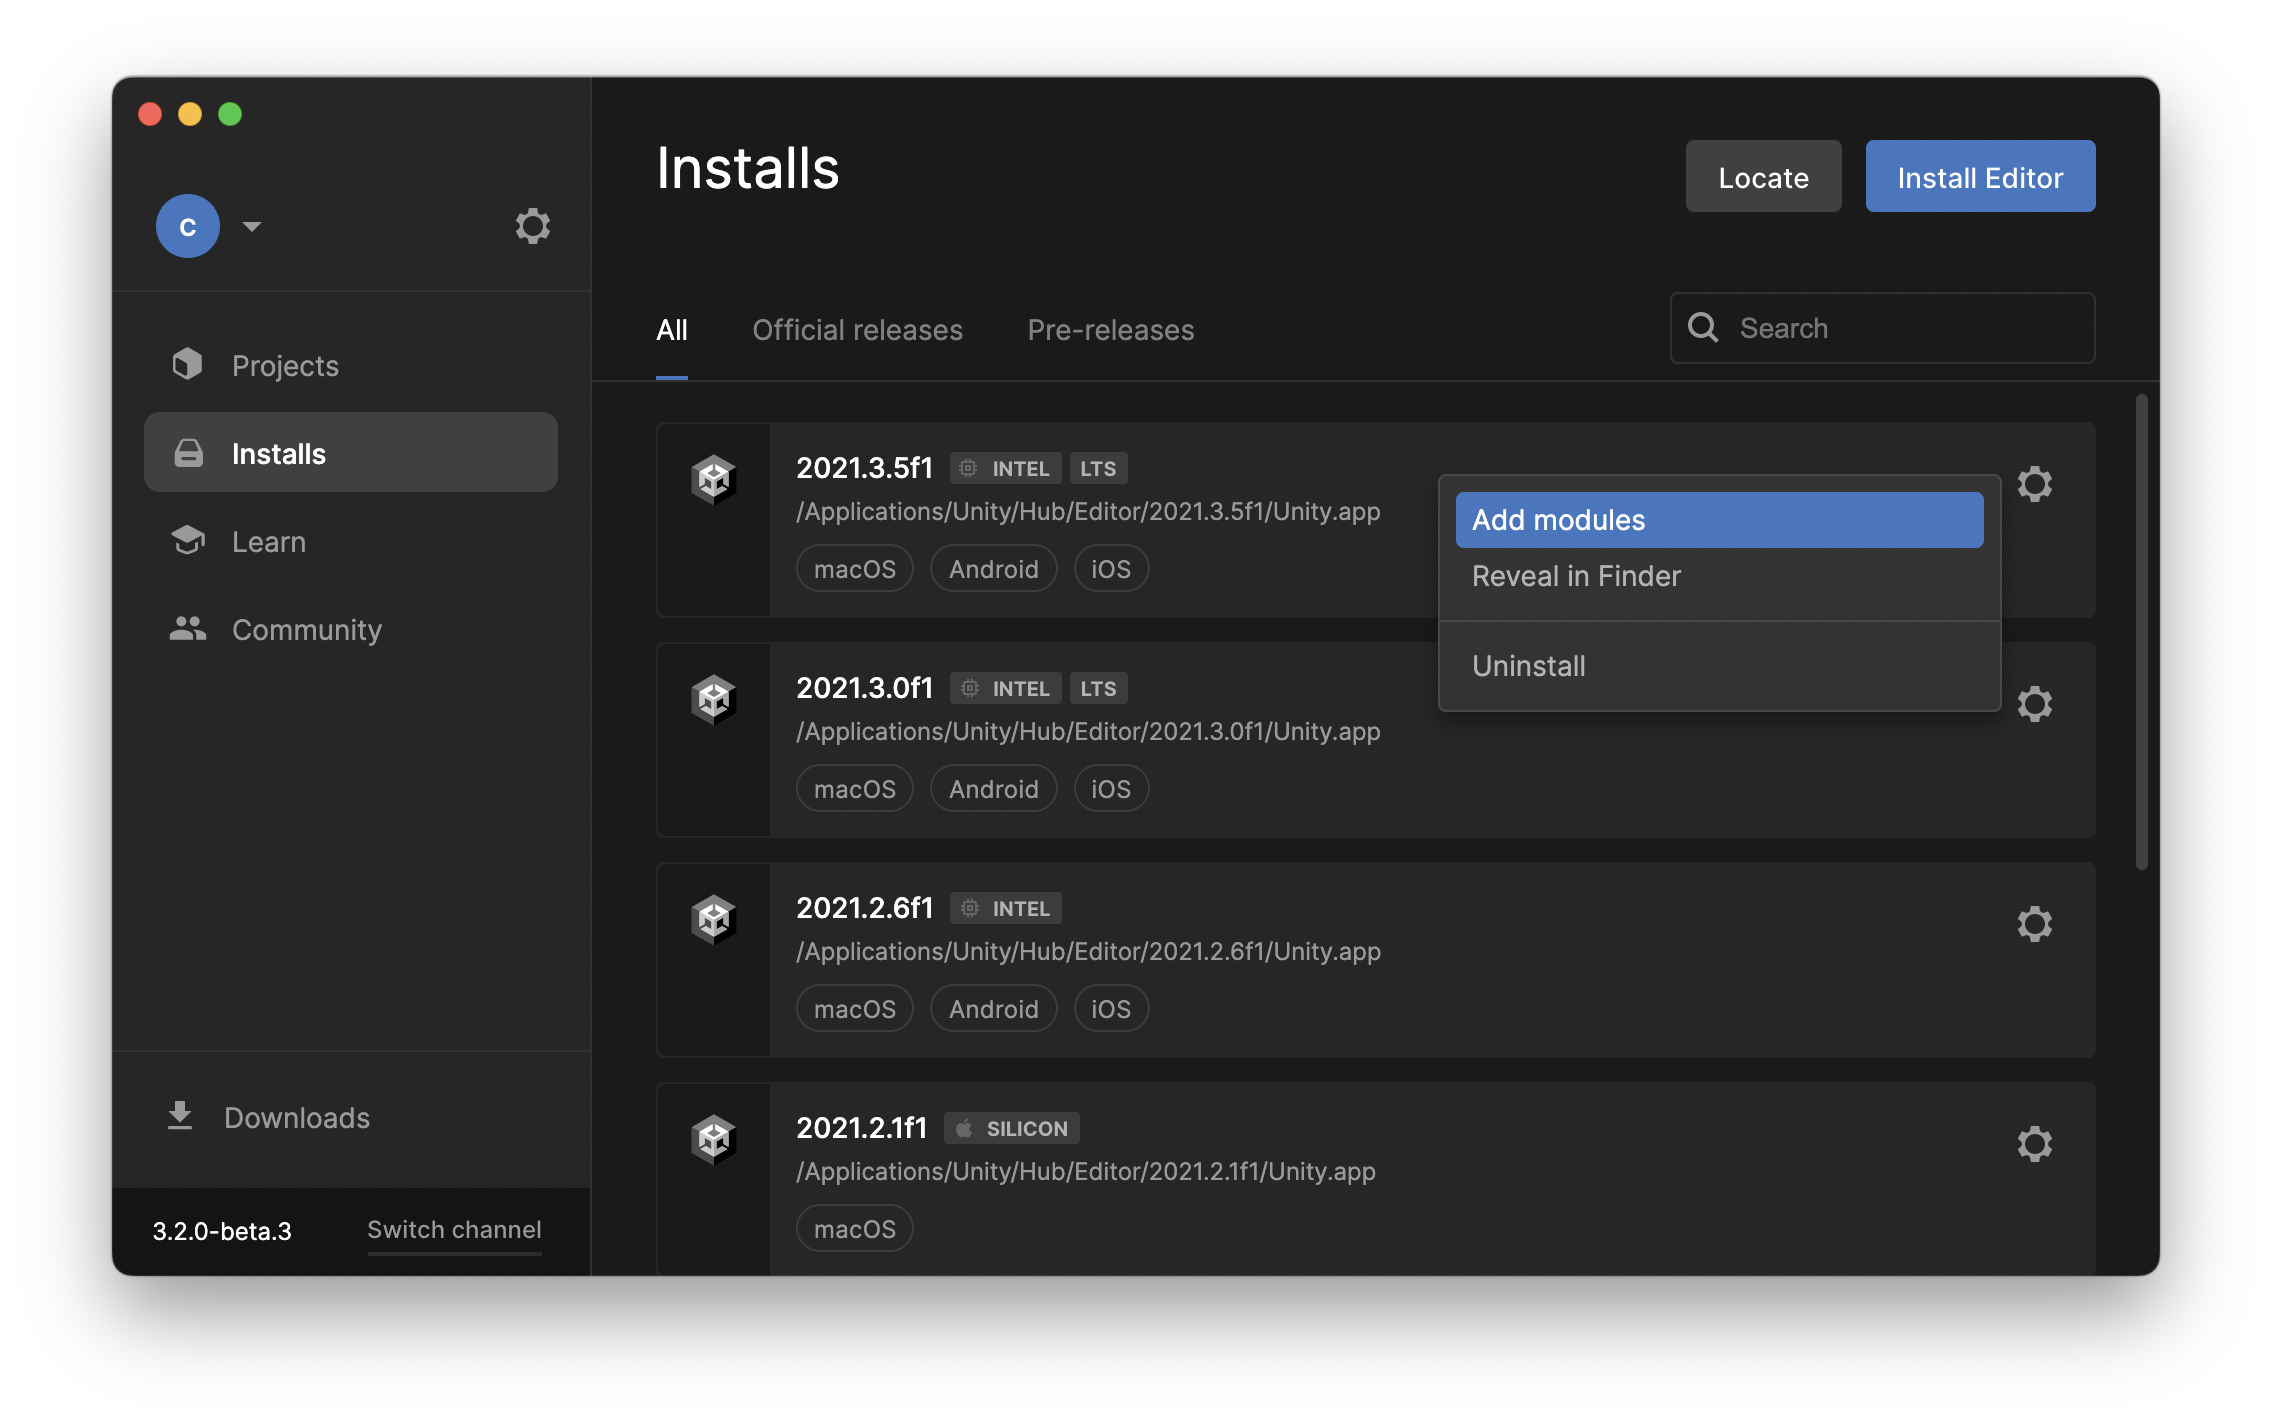
- If not installed, the additional options menu (Gear icon next to the chosen Unity version on the Installs tab) should allow you to install it via the Add Modules option
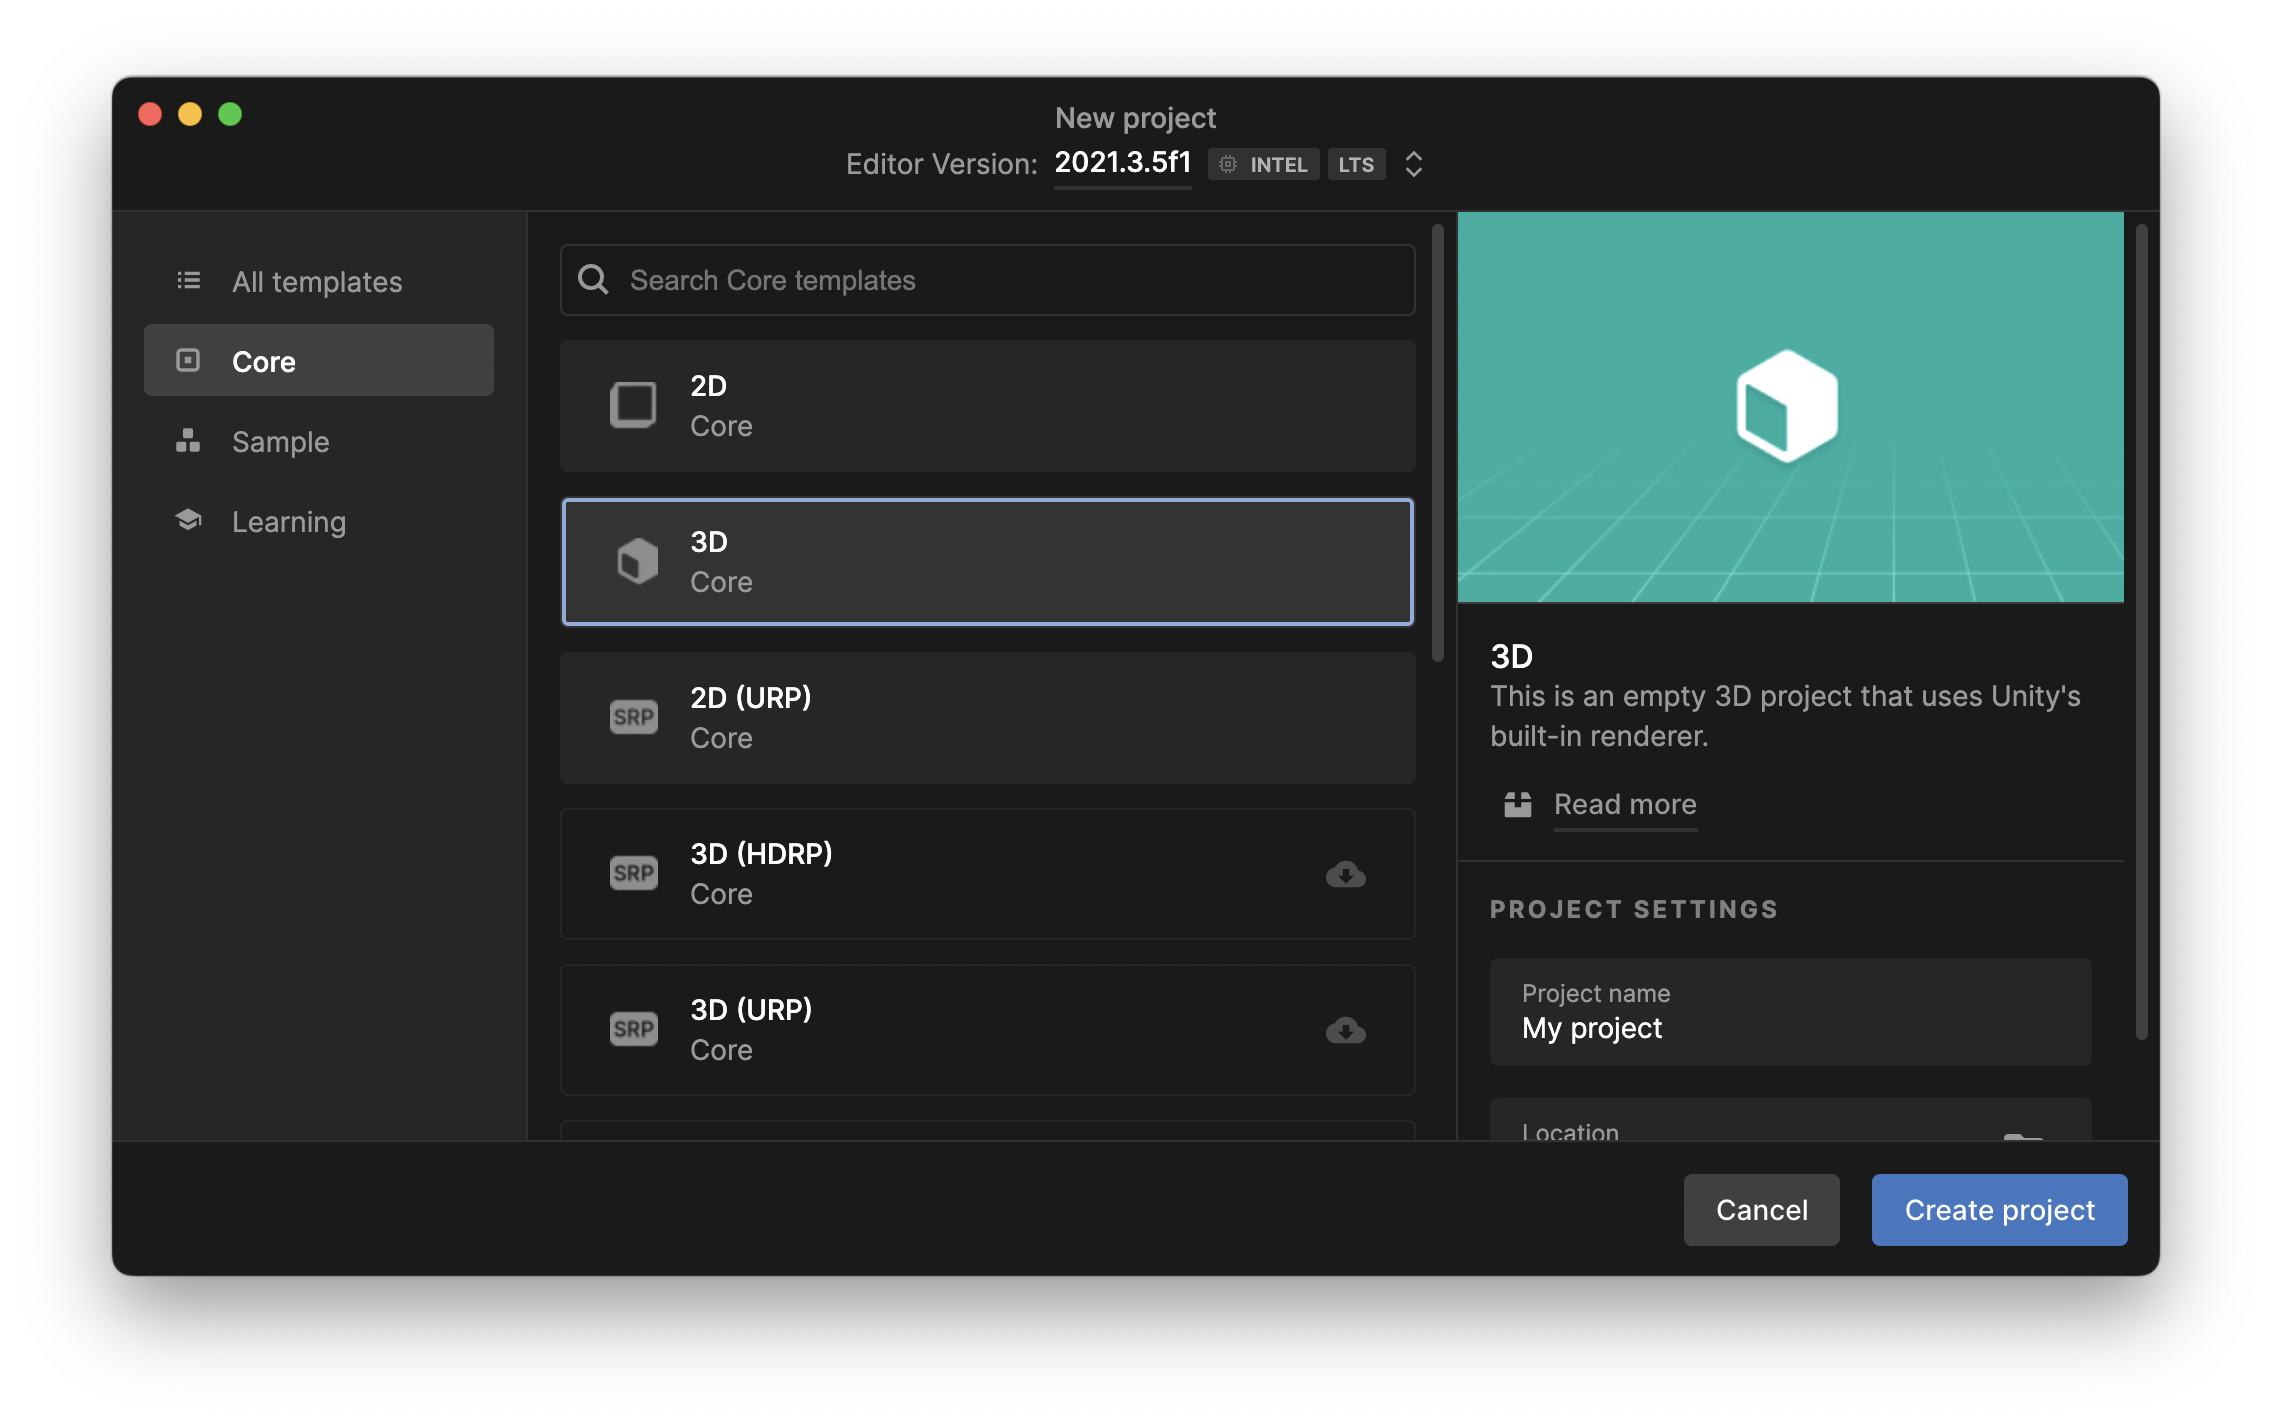
- On the Projects screen, click New project and use the Core - 3D template using Unity 2021.3, then open it
Import the AR Controller Unity package into your Unity project
- Locate the AR Controller SDK .zip file (e.g. ARController-beta-2019-10-16-v0-4-2.zip) - i.e. find it in your downloads folder, or download it if you have not done so already
- Unzip/decompress the AR Controller SDK .zip file
- Using Mac’s Finder app or Windows Explorer (in a new window), open the root folder of the Unity project you created for AR Controller
- Drag and drop the unzipped AR Controller package into the Packages folder of your Unity project
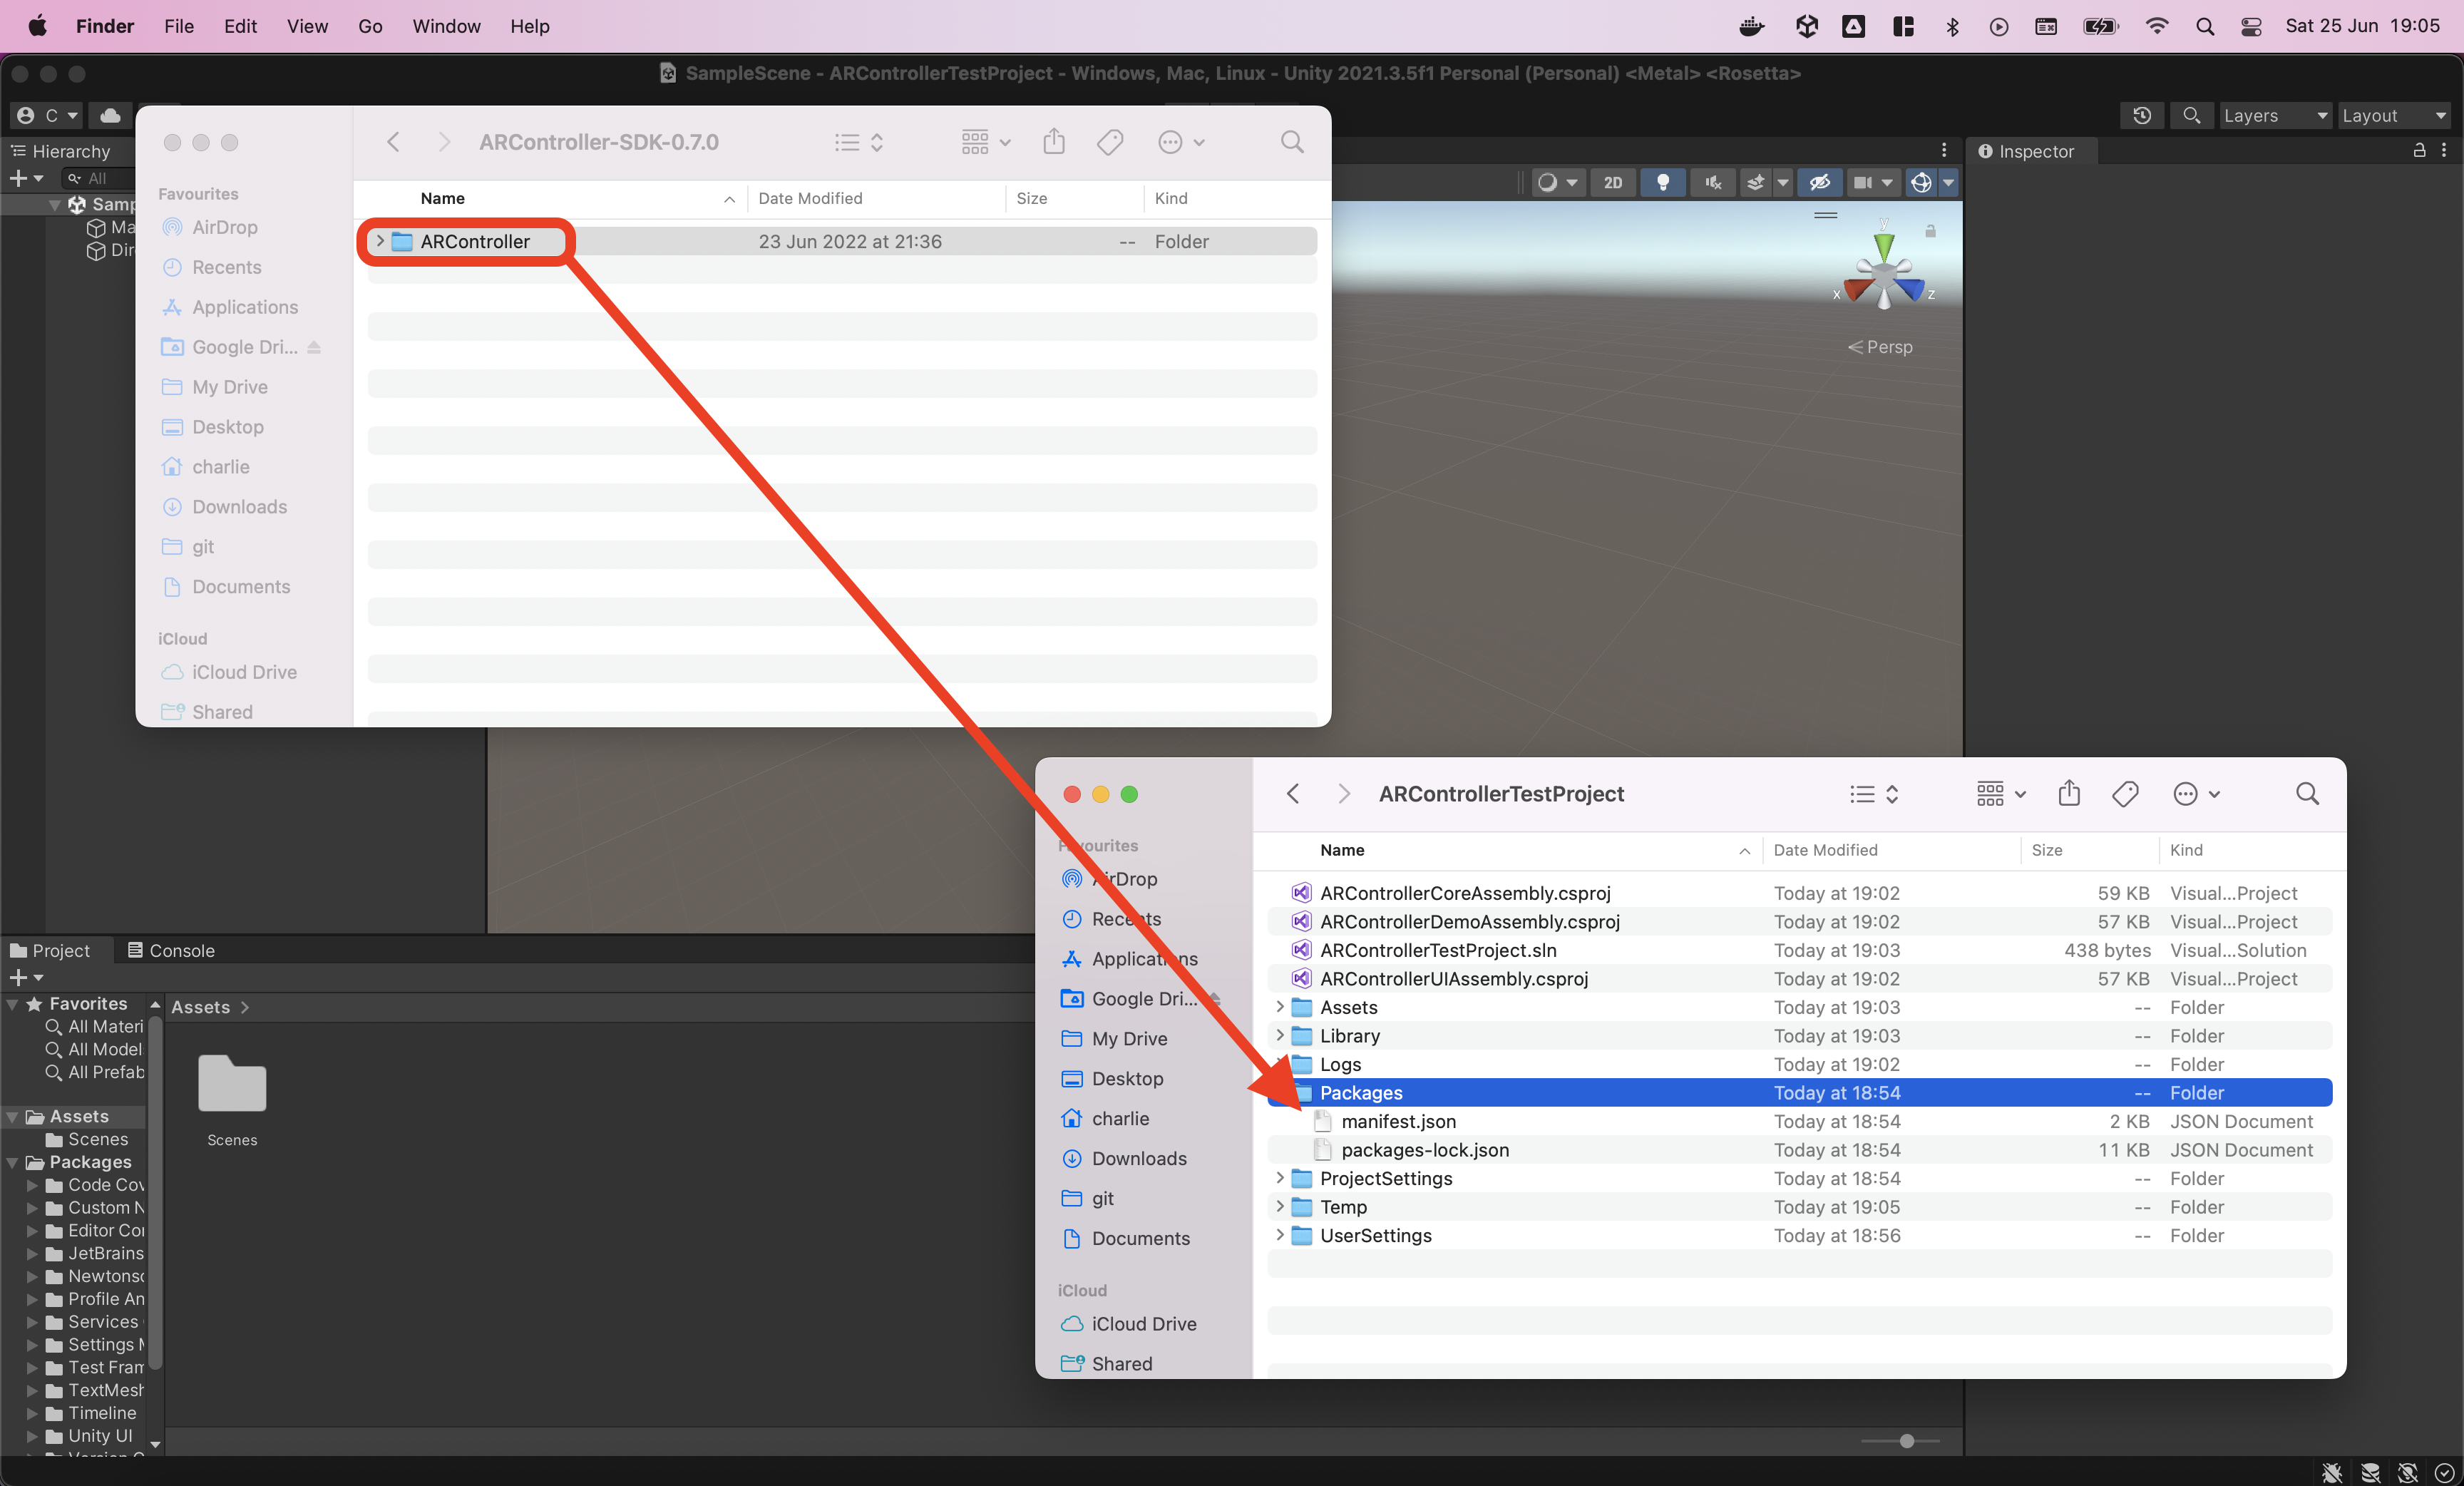
This will not work correctly if you drop the package directly into the Unity Editor - Unity will instead place the SDK within the “Assets” folder!
- If you are upgrading your AR Controller SDK package from a previous version, you can now delete the old version (however Unity should automatically use the latest version)
- Return to your project in Unity - Unity will automatically install the AR Controller assets into your project; these assets can be found in the Unity Project window, under AR Controller Beta SDK
- If you are using OSX Catalina, you may be prompted with a security notice, similar to the one pictured below. If this happens, you will need go to System Preferences -> Security & Privacy -> Allow apps… and specify that the AR Controller SDK is permitted to run on your computer.
Prepare your project
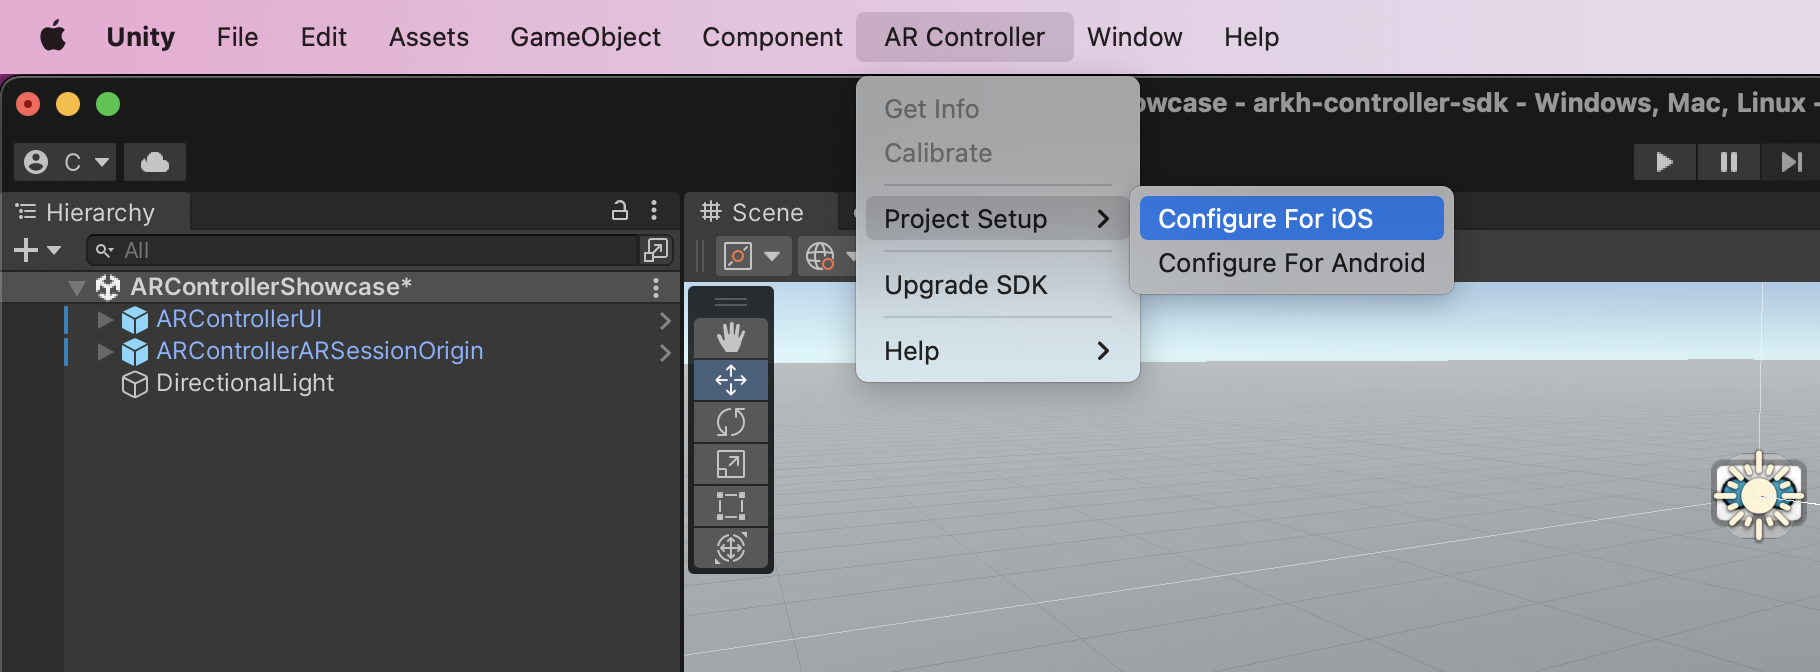
- If your project supports iOS devices, click AR Controller -> Project Setup -> Configure for iOS in the Unity Editor menu bar (this will automatically install ARKit packages and switch to iOS build platform)
- If your project supports Android devices, click AR Controller -> Project Setup -> Configure for Android in the Unity Editor menu bar (this will automatically install ARCore packages and switch to Android build platform)
- If your project supports iOS devices, check that mobile architecture is set appropriately (only ARM64 is supported by ARKit):
- In Unity, go to Project Settings -> Player -> iOS tab (click the mobile phone icon) -> Other Settings -> Configuration
- Set Architecture to ARM64
- If your project supports Android devices, check that Vulkan Graphics API is disabled (as it is not supported by ARCore):
- In Unity, go to Project Settings -> Player -> Android tab (click the Android icon) -> Other Settings -> Rendering
- Un-tick Auto Graphics API
- Click the minus (-) icon to remove Vulkan from the list
- Check that your graphics settings are suitable for mobile devices - this will be application specific:
- Look in Project Settings -> Quality
- Make sure the default level for your chosen platform is high enough to support your desired graphics settings (click the arrow at the bottom of the list of Levels to change the default)
- It is recommended that you enable shadows, as these greatly improve AR experiences - the default level for your chosen platform will likely need to be at least Medium for this
- Check Project Settings -> Graphics for other graphics settings
- If your project supports Android devices, enable ARCore as a Plug-in Provider under _Project Settings -> XR Plug-in Management -> Android tab
- If your project supports iOS devices, enable ARKit as a Plug-in Provider under _Project Settings -> XR Plug-in Management -> iOS tab
Set up your Game view for mobile compatibility
The AR Controller user interface is designed for iPhone X (2436x1125, Portrait), however other resolutions should scale dynamically
- Open the Game view (Window -> General -> Game)
- Open the resolution drop-down menu in the top-left of the Game view (it may read as “Free Aspect” or “iPhone 5 Tall”, for example)
- Select your chosen mobile phone screen resolution or create a new option by clicking the “+” at the bottom of the list - the options available will depend on the build platform selected in Unity Build Settings
- Ensure the Scale slider is set to the lowest possible value
The first time you connect to your AR Controller it may drift. To resolve this put your AR Controller on a table while it is still connected to the app, and leave completely still for 30 seconds. Then recalibrate.
Manual Setup
The “Project Setup” menu options should configure most settings as required for AR Controller. If you have issues with the automated process described above, you can try applying the following settings manually:
iOS
Within the Package Manager:
- Install
com.unity.xr.arkit
Within the Player Settings:
- Add Usage strings for the Camera and Location permissions
- Set the Target iOS Version to 12.2 or later
- Set the “Requires Full-screen” option to True
- Set the default UI orientation to Portrait
- Under XR Plug-in Management, select iOS and enable ARKit
Android
Within the Package Manager:
- Install
com.unity.xr.arcoreusing the Package Manager
Within the Player Settings:
- Set the Target Android SDK Version to 26
- Set the “Starts in Full-screen” option to True
- Set the default UI orientation to Portrait
- Under XR Plug-in Management, select Android and enable ARCore
Common Steps
Finally, within the Build Settings menu, ensure that the correct Platform is selected (this is indicated by the Unity logo next to it). “Switch Platform” if required.